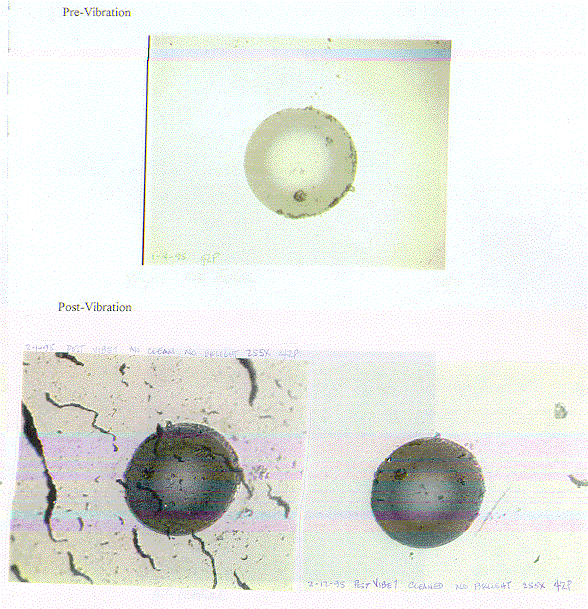
Following the vibration test using the thick bracket, the termini were removed and photographed before and after cleaning. Table 5 summarizes the observations following the first vibration test.
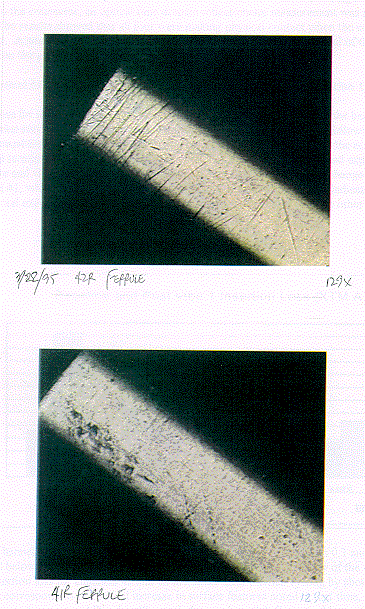
The size and shape of the metal filings found on 42P (Figure 16) suggest alignment sleeve fretting. This fretting occurs when the terminus revolves at some minute angle, around its longitudinal axis (without rotation) abrading the inside of the alignment sleeve. It should be noted that the alignment sleeve for channel 42 was noticeably looser than the others and often stayed inside of the connector when the termini was extracted. Figure 17 compares the condition of the ferrule of the pin for channel 42 and the pin for channel 41. The scratches seen on the channel 42 pin may be indicative of that circular motion inside of the alignment sleeve during vibration. Channel 41 pin does not show these scratches. The slot width of channel 42's alignment sleeve measured approximately 19% larger than the slot on the channel 41 alignment sleeve indicating that there may have been less of a retaining force between the sleeve and the channel 42 ferrules allowing ferrule movement.
The metal contamination found on 43R and 44P were similar to that seen on the rubber grommet due to abrasion between the connector and backshell and are large enough to block the optical path.
Table 5. Visual Observations Following the First Vibration Test
Terminus   Contamination Noted Before Cleaning   New Features Found After Cleaning

   41P    drops in a circular pattern (water    none
          vapor)

   41R    none                                  - scratch similar in appearance to
                                                existing scratches
                                                - feature at cladding outer
                                                diameter may be contamination or a
                                                rough spot, located at one end of
                                                the new scratch

   42P    large amount of metal filings of      two or more new rough areas in the
          sizes ranging between approximately   fiber core and many very small
          200 m x 4 m to specks less than 1 m   rough spots
          square.

   42R    large amount of small metal pieces    two new scratches
          in the range of 4 m square, most
          much smaller

   43P    several drops (water vapor)           none

   43R    - large metal pieces found on the     - one new rough spot at cladding
          ceramic ferrule (50 m x 100 m) on     outer diameter with small scratch
          fiber core.                           emanating from it
          - a few drops (water vapor)           - two large scratches, one deep

   44P    - one large metal piece on ferrule    one new rough spot in cladding
          (20 m square)                         outer diameter
          - drops in circular pattern (water
          vapor)

   44R    pre-existing alcohol residue          none

Pre-Vibration
Post-Vibration

Following the visual examination, the termini shrink tubing was
re-worked. The original shrink tubing had lost its ability to
adequately support many of the termini. This degradation was due
to the large number of times the termini had been inserted and
removed. Following reinsertion of the termini into the connector,
an optical time domain reflectometer measurement was taken for
each channel. The results showed that all four were making physical
contact when the connector was fully mated. A small reflection
was found approximately 8 inches from the end of the SMA connector
on the plug side of channel 44.
Table of Contents
 Next Section
 Up to TVA Homepage
 Back to the Library